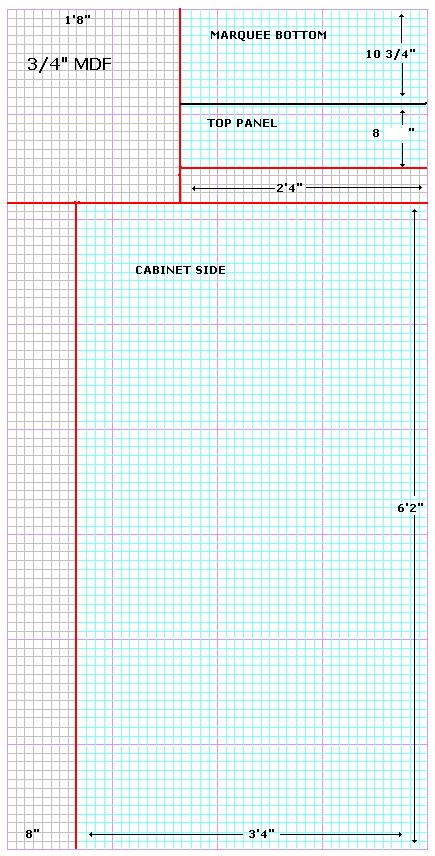
Purchase and Cut Wood - March 7th. The day started with a trip to the hardware store where we purchased all of the wood, screws, bits, glue and primer. Once we unloaded the wood we started to mark and cut it. Over the next several hours we were able to cut all of the wood into the various shapes and sizes needed. The olny cuts left are on 6 of the 8 side panels. The remaining 6 side panels only need to have the shaped cuts made to match the markings we transfered over from the template. The three XBOX based cabinets will need holes in their control panels cut so that the joystick assemblies can be dropped in. Click here to see Day 1 Pictures
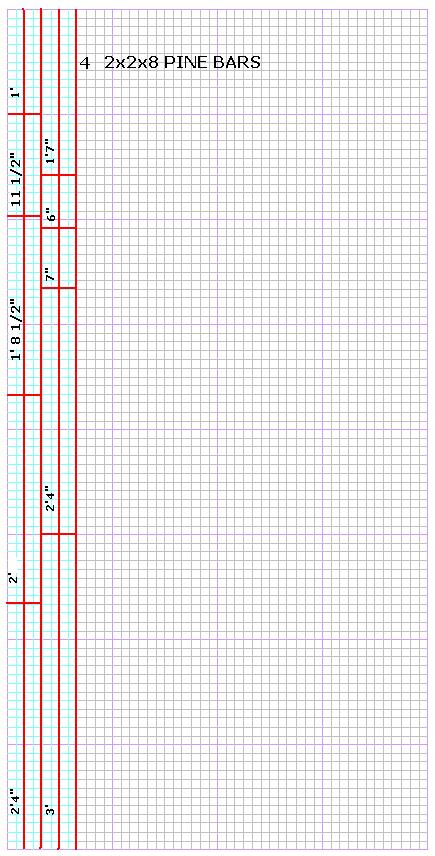
Cut, Route and Assemble Side Panels- March 13th. The day started with trimming and sanding each cabinet side panel pair so that each cabinet would be perfectly aligned on each side. Once all 4 cabinets had been aligned each side panel was routed to allow for the 3/4" t-molding strips to be cut and added. Once all of the side panels were complete we started to add the internal support 2x2's using our template for proper placement. We managed to get the internal 2x2's installed on two of the cabinets before we ran out of time. Click here to see Day 2 Pictures
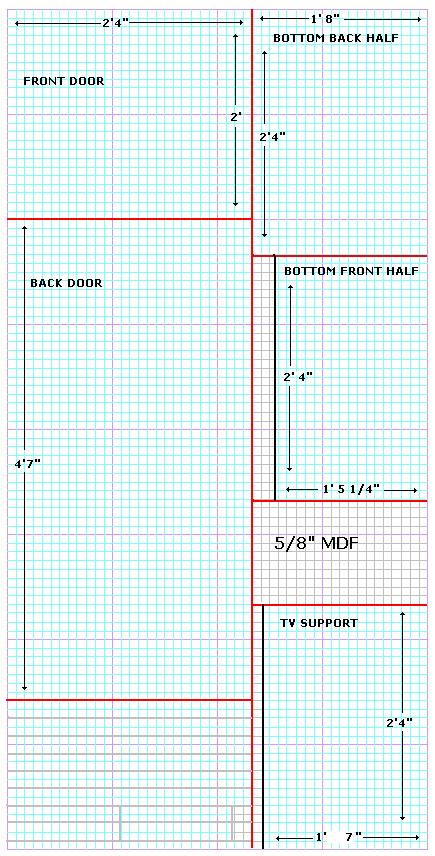
Custom Cuts, Trim and Assemble Side Panels- March 22nd. We began after work that evening. Some of the team meet earlier in the week to finish assembling the remaining four side panels, When we started the evening one side panel still required some work, so it was the first thing we finished. We quickly built a 24 1/2" guide tool to make quick easy work of trimming all of the front, bottom, top and back panels down by 2" each (We discovered that the cabinets would otherwise be too wide to fit through some standard doorways). We cut holes in the back panels to requiring extra room to accommodate the 25" TV's. We also cut a Coin door hole in one of the front door panels. The next time we meet we should be ready to start assembling all of these pre-cut parts into complete cabinet shells for priming and painting.Click here to see Day 3 Pictures
Assemble Cabinet Frames - March 29th.We began after work that evening. We spent most of the night assembling the cabinet panels to the side panel frames. By the end of the night we had all for cabinets mostly assembled. We had to trim down 3 back panels for a better fit. Earlier in the week we tested the coin door hole with an actual coin door purchased from e-bay and it fit perfectly. We also received the Marquee edge brace material, Plexiglas and a second coin door from e-bay earlier in the week.Click here to see Day 4 Pictures
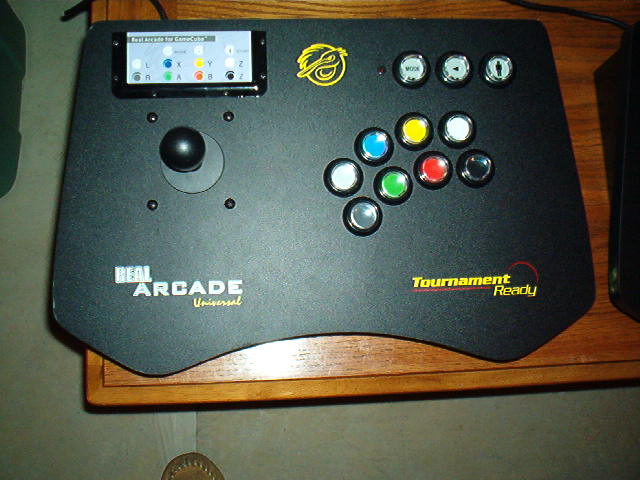
Primer, Paint & Hardware - April 5th.We began after work that evening. We primed all 4 cabinets and managed to paint 2 using semi-gloss black house paint. We cut the holes for the Real Arcade joysticks in the control panel tops and marked the cuts for the control panel sides. We also cut the hole for the 2nd coin door. We also purchased some hardware and Marquee lights. Earlier in the week some cabinet reinforcements and door/drawer design changes were prototyped on 1 cabinet. Click here to see Day 5 Pictures
Paint & Alignment - April 10th.Finished painting the remaining 2 cabinets. Spent the majority of the day attaching reinforcement 2x4's and 2x2's while realigning and tightening the cabinet structures. Click here to see Day 6 Pictures
Plastics - April 14th.Printed Marquees on Transparency Film. Installed Marquee light fixtures. Cut all Marquee Plexiglas, and cut all Bezel Plexiglas. Cut Marquee Holders and mounted Marquees.Click here to see Day 7 Pictures
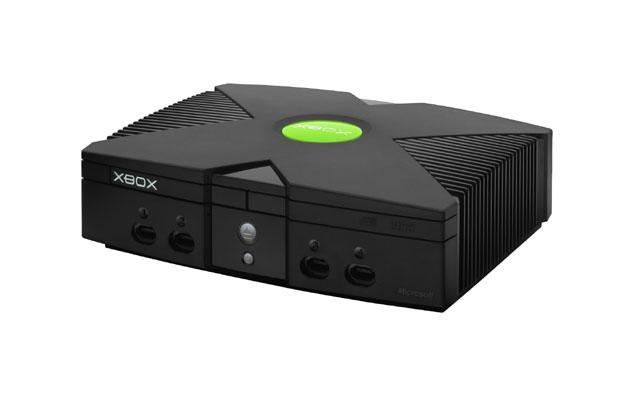
Assembl Bottom Front - April 19th.We spent most of the time completing and mounting the front door/drawer/shelf units. 3 Designed to hold the XBOX systems and 1 to house a full size PC ATX Cabinet. We also started to build the control panels by installing the bottom mounts using 1x2's and carriage bolts and nuts with nylon centers.Click here to see Day 8 Pictures
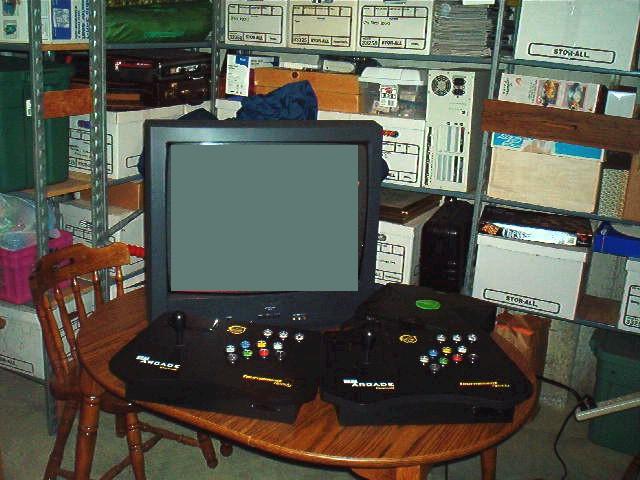
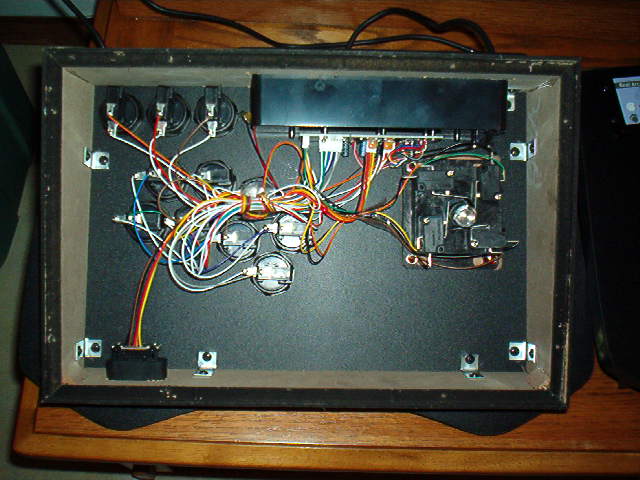
Assemble Control Panels - April 26th.We completed assembling 2 XBOX based cabinet Control assemblies and 1 PC control assembly (still needs associated wiring). We completed 2 bezel assemblies. We installed an XBOX and spent some time 'testing' it in a cabinet.Click here to see Day 9 Pictures
Completion / Touch-up paint - April/May 4th.We completed the 3rd XBOX cabinet control panel and the Body of the PC based cabinet control panel. A second control panel shelf was prototyped for other controllers such as steering wheels or items like the Steel Battalion 3 foot Joystick assembly. We added a second coat of paint to all of the cabinets including some internal painting work. We added feet and installed 1 coin door. Two of the control panels were treated with FleckStone and several layers of a clear matte finish. A Monitor base was constructed for the PC Monitor in the PC based cabinet. We created and mounted the third bezel and insert. All cabinets are for the most part complete. We assembled one of the XBOX based units and 'tested' for the remainder of the night.Click here to see Day 10 Pictures
Delivered - May 14th 2004We started in mid afternoon and finished up at around 1:30am - we traveled 217 miles total and delivered 3 cabinets - 2 to basements and 1 to a first floor office. We rented a 17' U-Haul and spent $52 dollars in gas.Click here to see Day 11 Pictures of Cabinet 4 which has a Steel Batallion interchangable control panel modification.